All Categories
Featured
Table of Contents
- – Travel Trailer Ceiling Repair Ontario, CA
- – OCRV Center
- – Rv Travel Trailer Repair Near Me Ontario, CA
- – Travel Trailer Ceiling Repair Ontario, CA
- – Travel Trailer Floor Repair Ontario, CA
- – Camping Trailer Repair Near Me Ontario, CA
- – Camper Trailer Service Ontario, CA
- – Travel Trailer Floor Repair Ontario, CA
- – Travel Trailer Floor Repair Ontario, CA
- – Travel Trailer Repairs Ontario, CA
- – Camper Floor Repair Near Me Ontario, CA
- – Travel Trailer Roof Replacement Ontario, CA
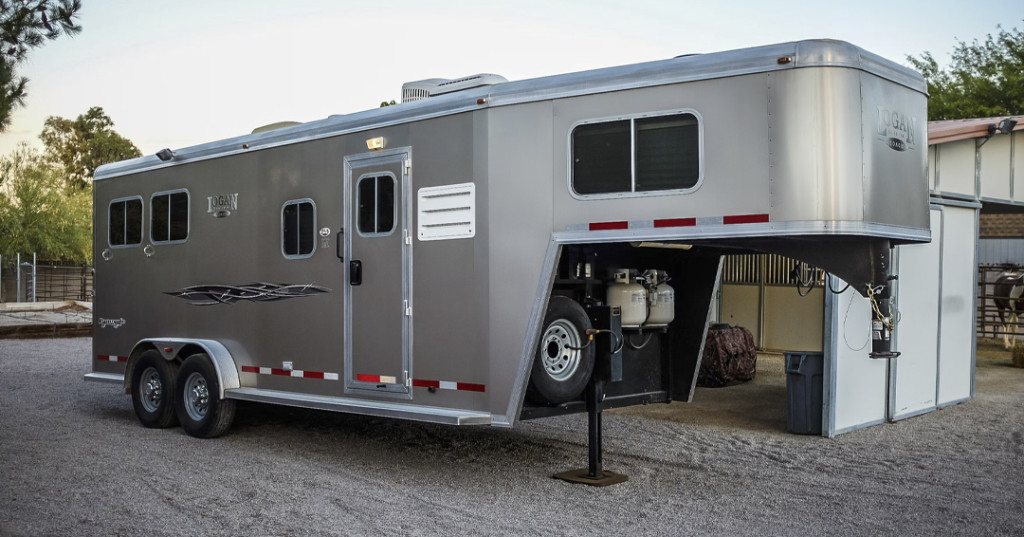
- – Horse Trailer Repairs Ontario, CA
- – Camper Floor Repair Near Me Ontario, CA
- – OCRV Center
Travel Trailer Ceiling Repair Ontario, CA
Axle makes advise that brakes be serviced annually. Our annual solution package consists of total cleaning, checking and repacking the bearings, replacing the seals and cotter pins or tang washing machines. Cleaning, lubing and adjusting the brakes. Consisted of is full inspection of the axles, frame, flooring, doors and ramp. The breakaway system is checked in addition to all electrical parts.
All relocating parts are oiled. Our goal is to keep your steed trailer effectively serviced so you have the confidence and flexibility to take a trip safely where ever and whenever you want to. [AWL-BlogFilter blog_image="yes" blog_image_quality="tool" blog_image_hover_effect="none" blog_title="yes" blog_title_color="# 000 blog_desc="yes" blog_desc_words="100 blog_read_more="yes" blog_read_more_text="Find out more" blog_pagination="yes" blog_filters="yes" blog_buttons_color="# 136c9f" blog_filtering="blog_category" selected_categories="" custom-css=""]
When it involves trailer repair service in Western New york city, General Welding & Fabricating attracts attention as the go-to location. With our considerable experience and dedication to quality, we supply superior repair service services for trailers of all kinds. Whether you require brand-new bearings, centers, structure repair work, or also total axle replacements, we have the know-how to finish the job.
Rv Travel Trailer Repair Near Me Ontario, CA
New Bearings and Hubs: One of the most usual issues with trailers is worn-out or broken bearings and centers. Malfunctioning bearings can cause extreme friction, warmth buildup, and inevitably, trailer failure. At General Welding & Fabricating, we recognize the importance of maintaining appropriately operating bearings and hubs. Our competent professionals have the knowledge and competence to diagnose any kind of problems and offer effective repair services or substitutes.
In some instances, fixing a trailer may not be the most economical or useful remedy. If the damage to your trailer is considerable or if it's more affordable to change certain elements, we use high-quality substitute options.
With our know-how in trailer layout and manufacture, we assure a seamless fit and optimal performance. Customer-Oriented Technique: At General Welding & Fabricating, customer fulfillment is at the leading edge of whatever we do. We pride ourselves on our devotion to outstanding solution, timely fixings, and reasonable pricing. Our experienced team takes the time to comprehend your requirements, assess the condition of your trailer, and suggest the most effective strategy.
Travel Trailer Ceiling Repair Ontario, CA
We can do any type of repair work in-house and will make sure your trailer passes NYS evaluation. We can fix and evaluate your Equine Trailers to guarantee your financial investments are securely carried!
If what you're seeking is not listed, provide us a phone call. We like a difficulty and can deal with almost any type of fixing you might require. We also provide trailer devices, trailer upgrade plans, and great deals of drawback products. We anticipate aiding you obtain one of the most out of your trailer investment! "Thanks to the terrific personnel at AJ's for fixing my trailer and getting me back when driving so quickly! I was traveling via when my steed trailer lost a wheel.
They were extremely friendly and recognized the urgency of my scenario. You individuals are wonderful!"Eric, Maine "I was traveling on I81 North, pulling a trailer when one of the tires on my trailer burnt out. Parts of rubber went all over and I was forced to draw over along the side of the freeway.
I did not have a spare tire so I asked if he understood of anyone close by that might change my tire and offer me a spare. The gentleman, Tom, informed me to call AJ's Truck and Trailer. I called AJ's and got a pleasant welcoming from Amanda that provided me a terrific price on a new tire and a discount on an extra.
Travel Trailer Floor Repair Ontario, CA
The team at AJ's offered to take ma back to my truck. My old tire was demounted, new tire installed, and I got the extra in just 20 mins. I was provided an adventure back to my vehicle and trailer by their service technician Andy, at on the house. Andy assisted me with my tire and really did not leave up until I was back when traveling securely.
Offering Farmington Hills, Farmington, Novi, Livonia, Northville Because 1958 When it concerns your equines, security constantly precedes. Before you fill your steeds into the trailer, make certain to hook up and execute a brief inspection of the tires and lights. Maintain a tire scale handy and examine that the tire is holding the correct pressure (called PSI)
Dry rot can happen also if the tire tread still looks terrific, and when those cracks reveal up, your tire becomes compromised. And once more, bear in mind to check your spare tires as well.
And don't fail to remember the spare tires. The right stress for your steed trailer tires lies exactly on the tires. Many tire blowouts occur due to the fact that a tire had not been effectively inflated, so take a couple of minutes to check before you leave. Equine trailers require specific tires, mostly because of the load they're lugging.
Camping Trailer Repair Near Me Ontario, CA
If what you're looking for is not provided, give us a telephone call. We like a difficulty and can take on practically any kind of fixing you may need. We additionally use trailer devices, trailer upgrade bundles, and lots of hitch supplies. We eagerly anticipate helping you obtain one of the most out of your trailer investment! "Thank you to the fantastic personnel at AJ's for fixing my trailer and getting me back when driving so promptly! I was taking a trip with PA when my steed trailer shed a wheel.
They were really friendly and recognized the necessity of my scenario."Eric, Maine "I was traveling on I81 North, lugging a trailer when one of the tires on my trailer blew out.
I did not have an extra tire so I asked if he knew of anybody nearby that can alter my tire and sell me an extra. The gentleman, Tom, informed me to call AJ's Vehicle and Trailer. I called AJ's and got a pleasant greeting from Amanda that offered me a terrific rate on a new tire and a price cut on an extra.
The staff at AJ's volunteered to take ma back to my vehicle. My old tire was demounted, brand-new tire mounted, and I obtained the extra in simply 20 minutes. I was given an experience back to my vehicle and trailer by their specialist Andy, at no charge. Andy assisted me with my tire and didn't leave up until I was back on the roadway safely.
Camper Trailer Service Ontario, CA
Offering Farmington Hills, Farmington, Novi, Livonia, Northville Considering That 1958 When it concerns your equines, security constantly comes first. Before you fill your horses into the trailer, make certain to connect and perform a brief examination of the tires and lights. Maintain a tire gauge convenient and check that the tire is holding the appropriate stress (referred to as PSI).
Dry rot can occur even if the tire walk still looks excellent, and as soon as those fractures show up, your tire becomes endangered. And again, keep in mind to examine your spare tires too.
The correct stress for your equine trailer tires is located right on the tires. Steed trailers call for particular tires, primarily because of the tons they're bring.
If what you're seeking is not listed, provide us a phone call. We like a difficulty and can deal with just regarding any kind of type of repair service you might need. We additionally use trailer accessories, trailer upgrade plans, and great deals of hitch supplies. We eagerly anticipate aiding you obtain the most out of your trailer investment! "Thank you to the remarkable team at AJ's for fixing my trailer and obtaining me back when traveling so promptly! I was taking a trip with PA when my horse trailer lost a wheel.
Travel Trailer Floor Repair Ontario, CA
They were very friendly and comprehended the urgency of my circumstance."Eric, Maine "I was taking a trip on I81 North, lugging a trailer when one of the tires on my trailer blew out.
I did not have an extra tire so I asked if he knew of any person close by that can change my tire and sell me an extra. The gent, Tom, told me to call AJ's Vehicle and Trailer Facility. I called AJ's and received a pleasant greeting from Amanda that provided me a terrific cost on a brand-new tire and a discount on an extra.
Travel Trailer Floor Repair Ontario, CA
My old tire was demounted, new tire mounted, and I got the spare in just 20 mins. I was offered a ride back to my truck and trailer by their professional Andy, at no fee.
Serving Farmington Hills, Farmington, Novi, Livonia, Northville Since 1958 When it involves your horses, safety always precedes. Prior to you pack your steeds into the trailer, make certain to hook up and execute a short assessment of the tires and lights. Maintain a tire scale helpful and check that the tire is holding the appropriate pressure (referred to as PSI).
Dry rot can occur also if the tire tread still looks fantastic, and as soon as those fractures reveal up, your tire comes to be compromised. And once more, keep in mind to check your extra tires as well.
The appropriate stress for your horse trailer tires is situated right on the tires. Steed trailers call for specific tires, primarily since of the tons they're carrying.
Travel Trailer Repairs Ontario, CA
We look onward to aiding you get the most out of your trailer financial investment! "Thank you to the fantastic personnel at AJ's for repairing my trailer and obtaining me back on the road so quickly! I was traveling via PA when my steed trailer shed a wheel.

They were very pleasant and recognized the necessity of my situation."Eric, Maine "I was taking a trip on I81 North, hauling a trailer when one of the tires on my trailer blew out.
Camper Floor Repair Near Me Ontario, CA
I did not have an extra tire so I asked if he recognized of anyone close by that can change my tire and sell me an extra. The gentleman, Tom, told me to call AJ's Truck and Trailer. I called AJ's and obtained a pleasant greeting from Amanda that provided me a terrific rate on a new tire and a discount on a spare.
The team at AJ's offered to take ma back to my vehicle. My old tire was demounted, brand-new tire mounted, and I got the spare in just 20 minutes. I was provided an experience back to my vehicle and trailer by their service technician Andy, at on the house. Andy aided me with my tire and didn't leave until I was back on the roadway safely.
Serving Farmington Hills, Farmington, Novi, Livonia, Northville Since 1958 When it comes to your steeds, security constantly comes. Prior to you load your equines right into the trailer, be certain to connect and execute a short evaluation of the tires and lights. Keep a tire scale helpful and inspect that the tire is holding the correct pressure (referred to as PSI).
Travel Trailer Roof Replacement Ontario, CA
Dry rot can happen also if the tire walk still looks terrific, and when those splits reveal up, your tire comes to be jeopardized. And again, remember to evaluate your spare tires also.
And do not fail to remember the spare tires. The appropriate stress for your equine trailer tires is situated right on the tires. The majority of tire blowouts occur since a tire wasn't effectively inflated, so take a couple of mins to examine before you leave. Steed trailers require certain tires, largely as a result of the tons they're lugging.
If what you're looking for is not noted, provide us a phone call. We such as a difficulty and can deal with almost any type of type of fixing you may need. We likewise provide trailer accessories, trailer upgrade packages, and lots of hitch materials. We anticipate assisting you obtain the most out of your trailer investment! "Thanks to the remarkable staff at AJ's for fixing my trailer and obtaining me back when driving so rapidly! I was taking a trip through when my horse trailer lost a wheel.
Horse Trailer Repairs Ontario, CA
They were extremely friendly and recognized the urgency of my situation. You guys are terrific!"Eric, Maine "I was taking a trip on I81 North, towing a trailer when among the tires on my trailer blew out. Pieces of rubber went everywhere and I was compelled to draw over alongside the freeway.
I did not have a spare tire so I asked if he knew of any individual nearby that might change my tire and sell me an extra. The gent, Tom, told me to call AJ's Truck and Trailer Facility. I called AJ's and obtained a pleasant welcoming from Amanda that offered me a wonderful rate on a brand-new tire and a discount on an extra.
Camper Floor Repair Near Me Ontario, CA
The team at AJ's offered to take ma back to my vehicle. My old tire was demounted, brand-new tire placed, and I obtained the extra in just 20 mins. I was offered an experience back to my truck and trailer by their specialist Andy, at on the house. Andy aided me with my tire and really did not leave until I was back on the roadway safely.
Serving Farmington Hills, Farmington, Novi, Livonia, Northville Because 1958 When it concerns your equines, safety constantly precedes. Before you pack your equines right into the trailer, make certain to hook up and carry out a short examination of the tires and lights. Keep a tire scale handy and inspect that the tire is holding the correct stress (understood as PSI)
Dry rot can occur also if the tire tread still looks terrific, and as soon as those splits show up, your tire comes to be compromised. And again, bear in mind to check your spare tires also.
OCRV Center
Address: 23281 La Palma Ave Yorba Linda, CA 92887Phone: (714) 909-1444
Email: [email protected]
OCRV Center
The correct stress for your horse trailer tires is situated right on the tires. Steed trailers require certain tires, mainly because of the lots they're lugging.
Rv Trailer Repair Near Me Ontario, CATravel Trailer Replacement Windows Ontario, CA
Rv Trailer Repair Near Me Ontario, CA
Travel Trailer Awning Replacement Ontario, CA
Rv Travel Trailer Repair Near Me Ontario, CA
5th Wheel Repair Near Me Ontario, CA
Travel Trailer Siding Repair Ontario, CA
Camper Floor Repair Near Me Ontario, CA
Travel Trailer Awning Replacement Ontario, CA
Rv Trailer Repair Shop Ontario, CA
Camping Trailer Repair Near Me Ontario, CA
Rv Trailer Service Near Me Ontario, CA
Trailer Floor Repair Ontario, CA
Rv Trailer Repair Shop Ontario, CA
Trailer Restoration Ontario, CA
Camper Floor Repair Near Me Ontario, CA
Camper Floor Repair Near Me Ontario, CA
Trailer Restoration Ontario, CA
Travel Trailer Awning Replacement Ontario, CA
Trailer Awning Replacement Ontario, CA
Rv Trailer Repair Near Me Ontario, CA
Rv Trailer Repair Near Me Ontario, CA
Travel Trailer Furniture Ontario, CA
Horse Trailer Repairs Ontario, CA
Horse Trailer Repair Near Me Ontario, CA
Trailer Floor Repair Ontario, CA
Trailer Awning Replacement Ontario, CA
Travel Trailer Service Ontario, CA
Travel Trailer Service Ontario, CA
Camper Floor Repair Near Me Ontario, CA
Travel Trailer Ceiling Repair Ontario, CA
Camping Trailer Repair Near Me Ontario, CA
Camper Floor Repair Near Me Ontario, CA
Travel Trailer Furniture Ontario, CA
Travel Trailer Awning Replacement Ontario, CA
Travel Trailer Repairs Ontario, CA
Trailer Floor Repair Ontario, CA
Travel Trailer Awning Replacement Ontario, CA
Camping Trailer Repair Near Me Ontario, CA
Horse Trailer Repairs Ontario, CA
Rv Trailer Repair Shops Near Me Ontario, CA
Rv Trailer Service Near Me Ontario, CA
Travel Trailer Window Replacement Ontario, CA
Travel Trailer Replacement Windows Ontario, CA
Trailer Window Replacement Ontario, CA
Fifth Wheel Repair Near Me Ontario, CA
Horse Trailer Repairs Ontario, CA
Travel Trailer Service Ontario, CA
Trailer Windows Replacement Ontario, CA
Travel Trailer Siding Repair Ontario, CA
Horse Trailer Repair Near Me Ontario, CA
Travel Trailer Ceiling Repair Ontario, CA
Fifth Wheel Service Ontario, CA
Cargo Trailer Repair Ontario, CA
Rv Trailer Repair Near Me Ontario, CA
Cargo Trailer Repair Ontario, CA
Trailer Window Replacement Ontario, CA
Horse Trailer Repairs Ontario, CA
Travel Trailer Siding Repair Ontario, CA
Travel Trailer Window Replacement Ontario, CA
Trailer Restoration Ontario, CA
Camper Trailer Service Ontario, CA
Rv Trailer Repair Shops Near Me Ontario, CA
Trailer Roof Repair Ontario, CA
Travel Trailer Roof Replacement Ontario, CA
Travel Trailer Repairs Ontario, CA
Trailer Window Replacement Ontario, CA
Horse Trailer Repairs Ontario, CA
Travel Trailer Siding Repair Ontario, CA
Travel Trailer Window Replacement Ontario, CA
Travel Trailer Ceiling Repair Ontario, CA
Fifth Wheel Repair Near Me Ontario, CA
Horse Trailer Repairs Ontario, CA
Travel Trailer Repairs Ontario, CA
Rv Trailer Repair Near Me Ontario, CA
Camper Trailer Service Ontario, CA
Trailer Windows Replacement Ontario, CA
Travel Trailer Ceiling Repair Ontario, CA
Near My Location Seo Package Ontario, CA
Near You Seo Companies Ontario, CA
OCRV Center
Table of Contents
- – Travel Trailer Ceiling Repair Ontario, CA
- – OCRV Center
- – Rv Travel Trailer Repair Near Me Ontario, CA
- – Travel Trailer Ceiling Repair Ontario, CA
- – Travel Trailer Floor Repair Ontario, CA
- – Camping Trailer Repair Near Me Ontario, CA
- – Camper Trailer Service Ontario, CA
- – Travel Trailer Floor Repair Ontario, CA
- – Travel Trailer Floor Repair Ontario, CA
- – Travel Trailer Repairs Ontario, CA
- – Camper Floor Repair Near Me Ontario, CA
- – Travel Trailer Roof Replacement Ontario, CA
- – Horse Trailer Repairs Ontario, CA
- – Camper Floor Repair Near Me Ontario, CA
- – OCRV Center
Latest Posts
Travel Trailer Siding Repair Chino
La Habra Cargo Trailer Repair
Rv Solar Installation Chino Hills
More
Latest Posts
Travel Trailer Siding Repair Chino
La Habra Cargo Trailer Repair
Rv Solar Installation Chino Hills